Kuka LBR iiwa Java Setup
Note: currently Windows is required for the KUKA iiwa Sunrise Workbench
Install Sunrise Connectivity Suite
It is important that you use the Sunrise Connectivity Suite, as this contains the high performance tools needed for this system. If your installer doesn’t have the word “Connectivity” in it ask KUKA to send you the Sunrise Connectivity suite.
- Install Sunrise Connectivity Suite using the SunriseWorkbench 1.9 Connectivity Setup installer
Note
While KUKA installation steps are done on windows, grl itself runs on OS X and Linux Ubuntu 14.04
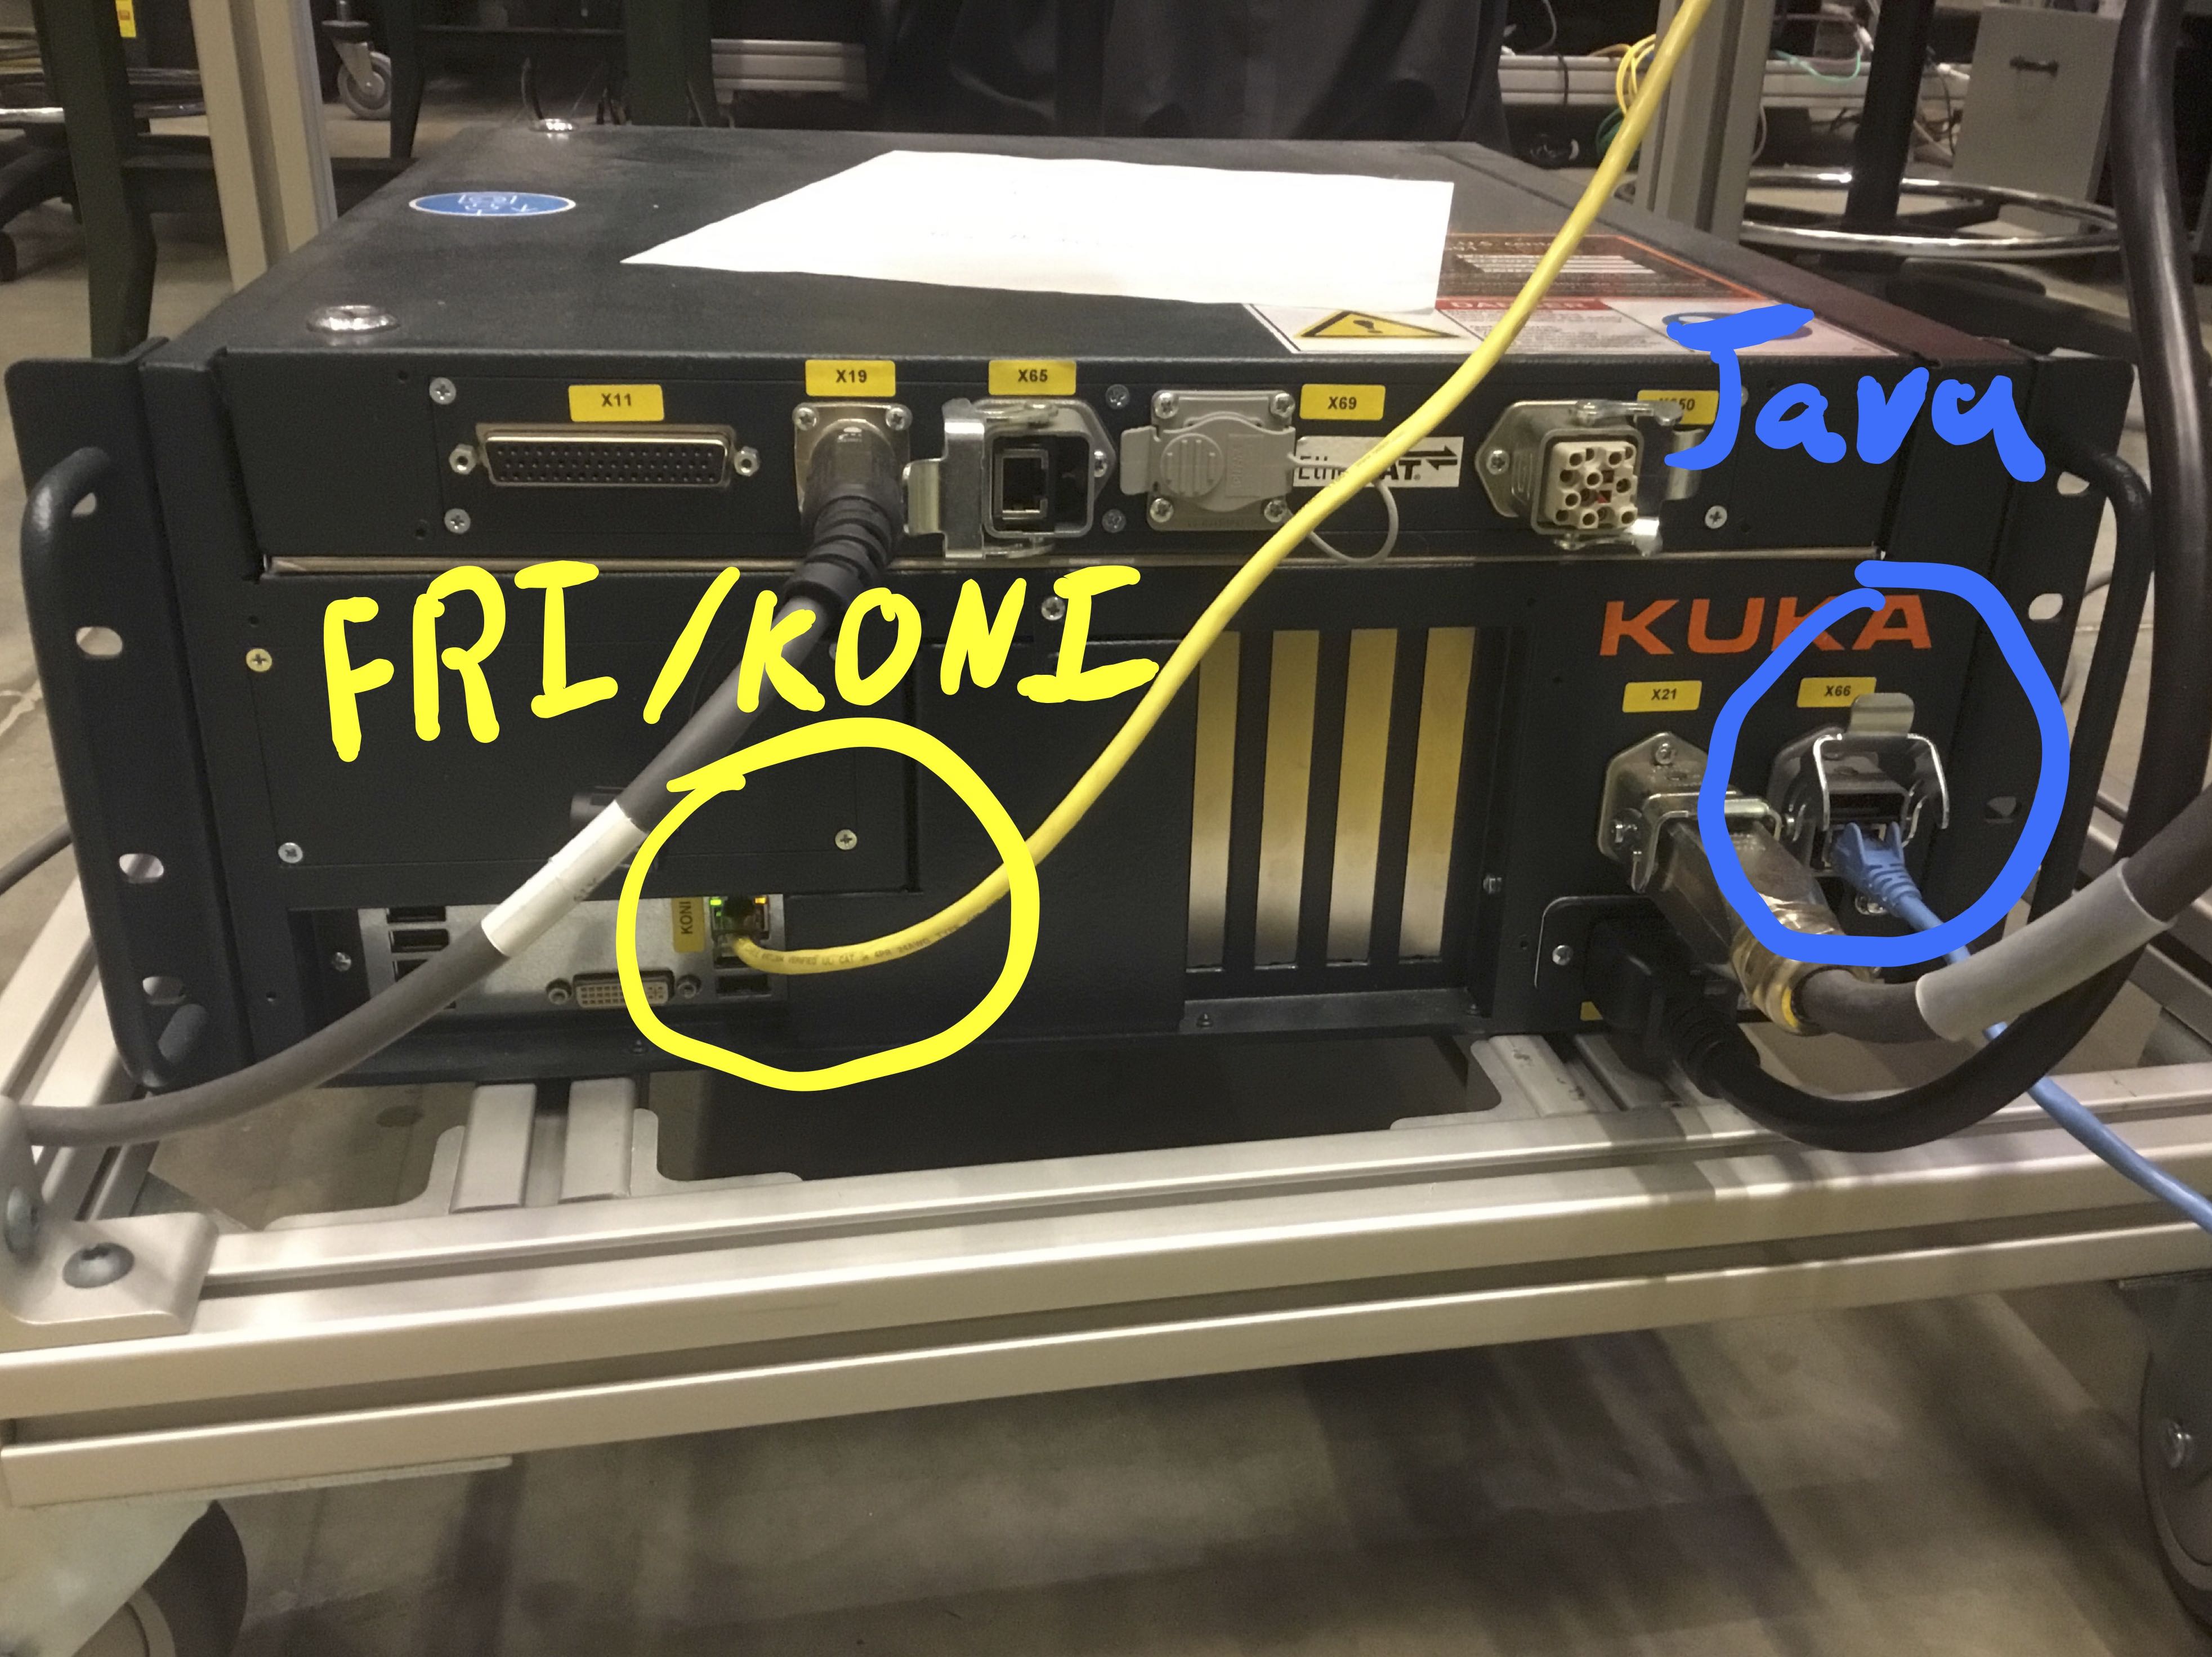
Connect the KUKA Controller
- Use two ethernet cables (you will need two ethernet ports on your computer)
- First cable connects to standard Java ethernet port
- Second Cable to the KONI ethernet port (if you are using FRI)
Set IP Address
See `IP Addresses<howto/IPAddresses>`_ for more detail on IP addresses.
Go to Control Panel > Network and Internet > Network Connections 1. Right click on wifi icon on Windows task bar 2. Select Open Network and Sharing Center 3. Select Change Adapter Settings on the left side of the window
Right click on ethernet icon and select Properties
Go to networking tab
Double click on Internet Protocol Version 4 (TCP/IPv4)
Change to Use the following IP address IP Address: 172.31.1.100
Subnet mask: 255.255.255.0 (should automatically fill out)
Select OK
Launch Sunrise Workbench
Right click on the Sunrise Workbench desktop icon and click “Run as Administrator”. The application may not launch otherwise.
Create a new Sunrise Project
- If starting a new project then use the IP address: 172.31.1.147
- Select the arm you have (ours was LBR iiwa 14 R820), then next
- Select the end effector attachment you have “media flange”, then next - Ours had electrical connections on the end so we selected “Medien-Flansch elektrish” - If you have tubes on the end you should probably select “Medien-Flansch pneumatisch”
- Finish
- Name your project
- Finish
Configure safety System to run a bare robot
Be aware that the following steps disable safety systems, and it is your responsibility to ensure safety of yourself and those around you. If you don’t have any safety systems and you are just starting with the robot for the first time do the following
- Open SafetyConfiguration.sconf
- Uncheck Row 1,2,3 “Emergency Stop External”, “Operator Protection”, “Protective Stop” respectively.
Enable Required Software Modules
If some of the modules are missing, you may not have the Sunrise Connectivity Suite. See the top of this guide for details.
Open StationSetup.cat
- On the bottom you will see tabs including:
- Topology, Software, Configuration, Installation
Select the “Software” tab
- Check “Install” for the following modules but don’t remove any that are already installed.
- Interface for Rendering Standalone(without plugin) implementation
- Tools and Models for Rendering.VREP
- Simple Tutorials for DirectServo (optional)
- Simple Tutorials for SmartServo (optional)
- Direct Servo Motion Extension
- Smart Servo Motion Extension
- Fast Robot Interface (required for grl)
Your Software should have each box checked and things should look similar to the image below.
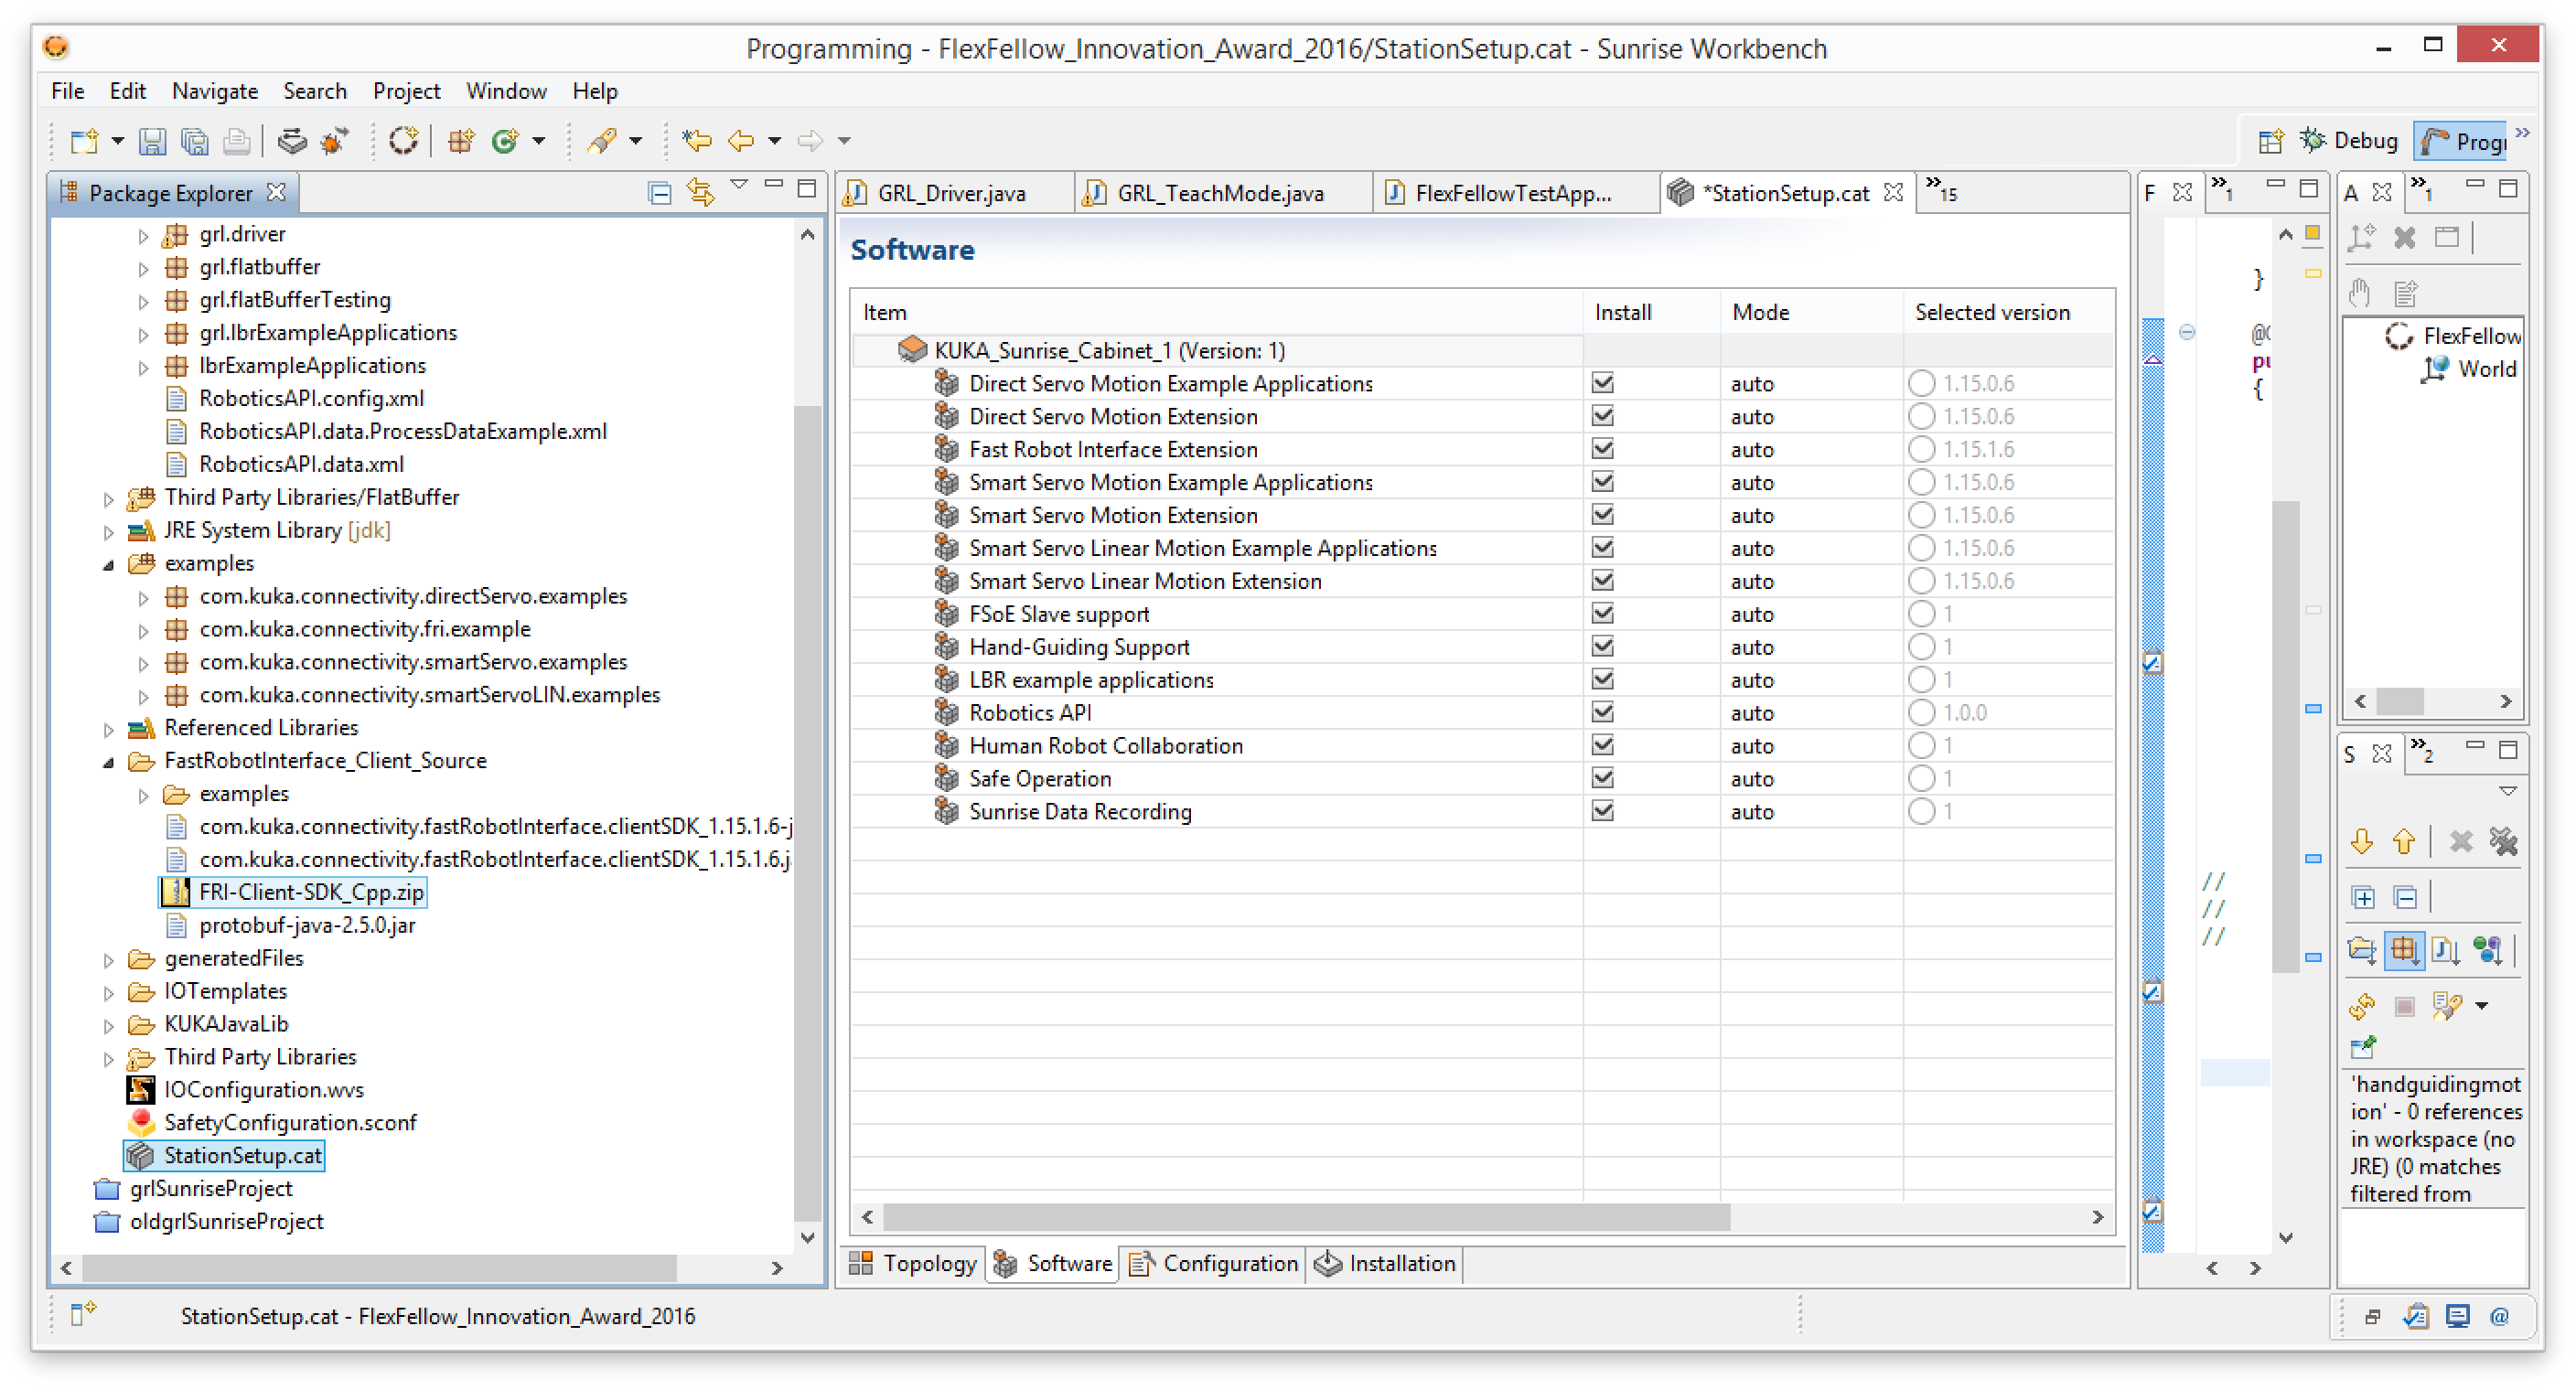
Go to the “Installation” tab visible in the image and click the button to install the software to the robot.
After installation is complete the FRI-Client-SDK_Cpp.zip file should be present as visible in the image above. Copy the FRI-Client-SDK_Cpp.zip file into the folder ${GRL_DIR}/data/ on your linux or OS X box with GRL for running the drivers.
Follow the C++ build steps specified in `Configure the build`_
If that doesn’t work, set the path to FRI-Client-SDK_Cpp.zip in CMake as follows:
cd path/to/grl
mkdir build
cd build
cmake .. -DFRI_Client_SDK_Cpp_zip_PATH="path/to/FRI-Client-SDK_Cpp.zip_folder"
make
Setup Java Driver Software
Copy the folders in
${GRL_DIR}/src/java/grl/
into the directory where your Sunrise Project is located.
- Configure the grl repository settings
Copy the KUKAJavaLib folder in your Sunrise Project and paste it into the grl folder
With the Sunrise Workbench open: - Import the grl project if it does not already appear in the Package Explorer on the left side
- File > Import
- In the GUI, select General > Existing Projects into Workspace
- Select Next
- Select Browse next to Select Root Directory and find the grl folder
- Finish
Right Click on your Sunrise Project - Select Build Path > Configure Build Path - In the GUI, select the Projects tab - Select Add
- In the GUI, check grl then OK and OK again
Install Software onto KUKA Controller
This will install the software by syncing a git repository kuka automatically creates with the robot.
Note
Installing and Syncing software are two separate steps!
Open StationSetup.cat
- On the bottom you will see tabs including:
- Topology, Software, Configuration, Installation
Select the “Installation” tab
Click Install
Sync Software onto KUKA Controller
Make sure the software is already installed.
Hit the Sync button, which is a gray box on the top row with an arrow pointing right and another pointing left.
Run in Autonomous Mode
Warning
You are responsible! This disables safety features, read KUKA’s documentation and be very aware of your robot and its surroundings.
- Pick up the tablet for the KUKA iiwa
- Turn the black key horizontally
- Select “Aut” for autonomous mode
- Turn the black key vertically
Running and Stopping Applications
- Select the “Applications list”
- Select your application such as “GRL_Driver”
- Press the “green play” button on the left side of the tablet that is pointing right.
Your application should be running.
- The red square button pauses
- The picture of a page with an X kills the application.
![]()
Table Of Contents
- Overview
- Quick Start
- How-to Guides
- Kuka IP Addresses
- Kuka LBR iiwa Java Setup
- Install Sunrise Connectivity Suite
- Connect the KUKA Controller
- Set IP Address
- Launch Sunrise Workbench
- Create a new Sunrise Project
- Configure safety System to run a bare robot
- Enable Required Software Modules
- Setup Java Driver Software
- Install Software onto KUKA Controller
- Sync Software onto KUKA Controller
- Run in Autonomous Mode
- Running and Stopping Applications
- VREP Setup
- Setup with Docker
- Milling simulation of bone shaped object
- Milling Simulation of simple object
- Setup with Docker
- Reference
- API